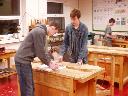
Rotary Racer 10: Todo List 2015 - 2016

Ideas for things todo

Status Group Work Who
  Management Try and get sponsorship money All
  Training Team members want to design/build a new car. As we have a lot of new members some skills need to be developed. So the first work is to learn to use 3D CAD and then use the VWT.  
  Design Learn 3D CAD by designing Greenpower cars for VWT. Cars will be simulated in the virtual wind tunnel and the one with the best aerodynamics wins a prize.  
  Media Update schools TV display and notice board ,
       
    GpDrivingSim  
  GpDrivingSim Create new tracks for driving simulator. Some tight ones etc. TrB, TB
  GpDrivingSim Look at suitable track editor or create one TrB, RP
  GpDrivingSim Create overal control program/Dialogs to control some main parameters such as track grip, cars speed etc. TrB
       
    Car Design  
  CarDevelop Research and play with different car ideas All
  CarDevelop Use VWT to investigate lowering/raising nose cone and tail TP,JM
  CarDevelop Use VWT to investigate enclosing front wheels TP,JM
  CarDevelop Use VWT to investigate overal car shape (lowering top at rear or any other ideas etc TP,JM
  CarDevelop New GpCarDisplay dashboard electronics LB
       
    Possible Items  
  GpCharger Research, Design and Produce a multi-battery raspberry Pi controlled battery charger  
  Communications Improve communications systems. Better microphone system. Ear pieces and microphones better installed into helmets with better wiring.  

Main Todo list

Date Description
2015-11-16 Meeting to discuss what to do for the year
2016-01-11
  1. VWT: Test raising or lowing front edge of nose code to defect air above or below the car.  (TP)
  2. VWT: Test adding front wheel covers to enclose the front wheels using 3D CAD and VWT. (JM)
  3. Measure cars dimensions and create a simple 2D cad drawing from top and side. Could use RR9's CAD design and update.
  4. Calculate appoximate forwards/backwards centre of gravity if we place the batteries near the front. Test by doing this with our car and scales. (LB, BS, W).
  5. Play with car design placing things on full sized paper model.
2016-02-05
  1. VWT: Testing continues
  2. Build new display PCB
  3. Make up parts list to buy things for building.
  4. Search for items to buy on the Internet.
  5. Get list of event dates and times and distribute.
  6. Python programming.
2017-03-27
  1. Finish making 4 x threaded stering support inserts.
  2. Check it batteries will fit where we want them.
  3. Rollbar: cut and shape cross tube.
  4. Rollbar. Cut and shape to join.
  5. Subframes: drill 6mm holes in all 8 support brackets.
  6. Steering: Cut and shape brake mounting plates.
  7. Steering: Cut and shape steering arms.
  8. Start welding brakets in place.
 

Done prior to 2017 winter

  1. Order: 4mm Plywood and 1.6mm plywood.
  2. Order: New batteries
  3. Subframes: weld brackets to subframes (steering and rollbar).
  4. Rollbar: weld parts together.
  5. Subframes: fit to car.
2017-11-06
  1. Rollbar:  weld to cross subframe members.
  2. Steering: measure, drill and fit/weld balljoint bushes.
  3. Brakes: mount caliper plate and caliper mounting stubs (weld). The caliper needs to be aligned with the brake disk with 2mm clearance.
 

Things todo in approximate order

  1. Order: 1mm aluminium sheet.
  2. Order: epoxy resin for Carbon fibre.
  3. Order: Tyres and tubes.
  4. Order: cogs and chain.
  5. Steering: fit disks to wheels (3 x washers ?)
  6. Steering: weld brake plates and steering arms to kingpin. Need to have wheels and disks in place.
  7. Steering: fit kingpins to subframe uprights with 8mm ball joints (two washers each kingpin ?).
  8. RearAxle: make wheel stubs from 25.4mm aluminium bar on lathe.
  9. RearAxle: cut to length and weld to rollbar/subframe at correct height.
  10. Joystick: we have main joystick inner with handle and milled grove.
  11. Joystick: cut outer tube to length.
  12. Joystrick: cut steering arm from aluminium flat bar (have we some material ?).
  13. Joystick: Get setting arm bar welded to tube and grove bolt boss.
  14. Joystick: make clamp.
  15. Joystick: putchase different barke level (in line cables).
  16. Joystick: fit (needs 2 x brackets made).
  17. Joystick: make tie rods and fit.
  18. Wheels make plywood panels and fit.
  19. Wheels fit tyres.
  20. Wheels: fit wheels to car and test.
  21. Harness: purchase
  22. Harness: fit.
  23. Drive: make rear wheel gear spacer.
  24. Drive drill and fit rear wheel drive gear.
  25. Drive: make motor mount and fit.
  26. Drive: fit cogs and chain.
  27. Batteries: make battery holders and fit.
  28. Electrics: purchase wire, battery connectors, switches, fuses etc.
  29. Electrics: Fit switches and main wirering.
  30. Electrics: make electronics aluminium box/tray.
  31. Electrics: fit electronics (Speed controller, computer, GPS, Telemetry).
  32. Electrics: fit display and connect.
  33. Electrics: fit wheel speed sensor.
  34. Electrics: fit joystick and connect.
  35. Electrics: fit horn.
  36. Electrics: fit brake light.
  37. Electrics: fit motor temperature sensor.
  38. Brakes: cut and fit cables and adjust.
  39. Body: cut and fit aluminium panels.
  40. Body: cut and fit steering tie rod covers (aluminium).
  41. Body: fit inside ply panels by front wheels.
  42. Body: cut and fit plywood bottom and bonnet.
  43. Body: add carbon/kevla fibre strengthening areas.
  44. Body: cut, fit and shape foam sides.
  45. Body: make nose and fit.
  46. Body: make tail and fit. (Need to decide fixing mechanism).
  47. Body: make windshield and fit with mirrors.
  48. Body: make rear wheel covers.
  49. Body: make front wheel covers.
  50. Body: make headrest/fairing.
  51. Body: make behind head fairing.
  52. Body: fit foot ridges.
  53. Body: paint and decorate.
  Goodwood final
  Future bits